Sunday, March 25, 2012

Pillow Dolls: Mommy, Daddy & Baby


I may have mentioned that we have a little visitor for a few months - a beautiful 21-month-old whose Mommy is deployed in the Middle East, and whose daddy is in training with the Navy.  She misses her mommy and daddy very much, and I decided I would make her some Mommy and Daddy pillow dolls to love on.

This also gave me the opportunity to try my hand at a craft I've been wanting to experiment with:  printing on fabric.

Printed fabric dolls created in Photoshop:  picture of three people in Photoshop
The first step was opening the images in Photoshop and getting rid of the background.  This can be done in any photo editing software.  Once the background was removed, I was ready to print.  


Printed fabric dolls created in Photoshop: one girl
I opened a new file set at my print size and pasted my first image into it.  I am fortunate enough to have a large format printer - it will print up to 13 x 19.   I cut out a poster board large enough to fit and fixed the fabric to the poster with tacky spray. 


Printed fabric dolls created in Photoshop: girl on a piece of fabric
I was very pleased with the way it turned out!  I used the "glossy photo" setting, and the fabric I used was an old white sheet I cut to size.


Printed fabric dolls created in Photoshop: man and little girl on fabric
After the first print, I realized I could get two images on one panel.


Printed fabric dolls created in Photoshop: girls hand on fabric with black lines on the fabric
The black lines are what happened when I thought I had all the wrinkles smoothed out.  If you look closely you can see black fuzzies surrounding the image.  I'm not really sure what that's from.  It was actually worse on the first print, but it shouldn't be noticeable on the final product.


Printed fabric dolls created in Photoshop: cut outs of three people
After printing, I placed the printed fabric on top of the backing fabric and cut around the edges, giving it about a 3/4" border.


Printed fabric dolls created in Photoshop: cut outs pinned to back of fabric
Next I pinned the front to the back.  I wanted to sew around the edges of the body, and I thought I could easily do that since the images could clearly be seen from the back.  Next time, however, I will draw around the edges first - areas like skin and light colored clothing were hard to make out when I  actually had it on the machine.


Printed fabric dolls created in Photoshop: cut outs sewn in
I sewed the edges twice, since this would be handled by a toddler, leaving the bottoms open for turning.  Then I trimmed the excess fabric and snipped the corners and curves.


Printed fabric dolls created in Photoshop: three dolls
After sewing, I turned the pillows right side out, stuffed them with fiber fill and sewed the bottoms closed.  They looked out of proportion, and I realized I should not have sewn right up against the edges.  Instead, I should have left about a quarter inch around to allow for the stuffing to spread out the sides.  Oh well, I'll know better next time.


Next came the true test for success:
Printed fabric dolls created in Photoshop: girl playing with dolls
Even though I thought they were far from perfect, I don't think she cared!


Printed fabric dolls created in Photoshop: girl hugging doll

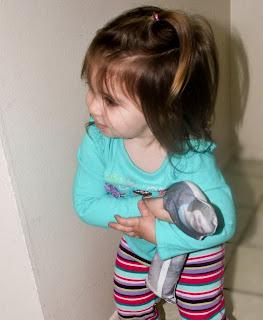
She carried them around the house like long lost friends, and loved to hug and kiss them and push them around in her buggy.  :)


Printed fabric dolls created in Photoshop: smiling girl squeezing doll
Time very well spent.

Thanks for looking, and until next time...

Go Get Crafty Sister!

Sister #2


Sweet Anne Designs

Thursday, March 22, 2012

Lovin' Our Peeps!

We love our Peeps, and we love creating fun Easter decorations, so you gotta know we LOVE creating Easter decorations with our Peeps!  Here is just a sampling of the cutest ones we've found so far, and of course, they all include the How To's:


Recycled Crafts:  Peeps on a stick
Oh, my, I will be putting these Peep Pops by Sugar Swings on my "to eat do" list!

Recycled Crafts:  Peeps on a wreath
Yum!  The Peeps over at Stampin' Mamas created this Peep wreath and a very well-written tutorial.  It uses an embroidery hoop, so you can make it in different sizes.

Recycled Crafts:  Peeps on a wreath
Peep-a-Boo Wreath from Tried & True--another great tutorial with clear instructions and good photos.  She also shows alternate designs in her updated wreaths.
 
Recycled Crafts:  Peeps topiary
Little Grow Peeps from Woman's Day.  I can't wait to make this one!


  Not just one tutorial, but a whole book of 'em!
Peeps: Recipes and Crafts to Make with Your Favorite Marshmallow Treat


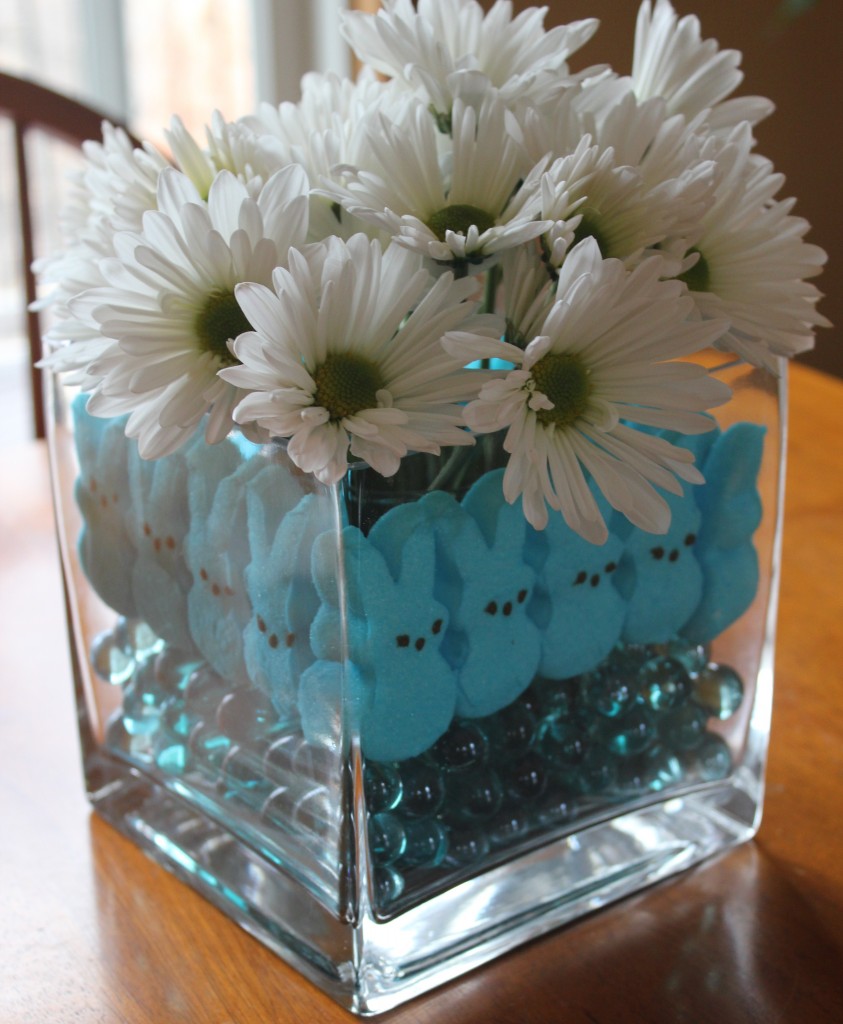
Recycled Crafts:  Peeps centerpiece
Beautiful Peep Centerpiece from Mommy Savers.  Since a good part of the supplies are from the dollar store, you can make this for under $10!
Recycled Crafts:  Peeps cake
The peeps over at Babble created this awesome Peep Sunflower Cake.  A Peep with every slice!
Recycled Crafts:  Peeps topiary
Topiary by Homespun Candle Momma - it looks difficult, but after checking out the tutorial, it is definitely in my skill range {easy!}.
Recycled Crafts:  Peeps plushie
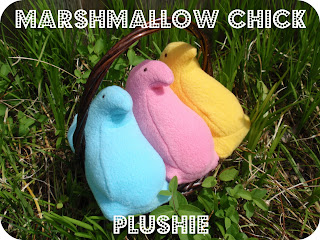
For the non-edible variety, Amanda over at Dandelions and Lace created these super-cute plush Peeps.  Love them!  (She also has a tute for bunny peeps :)
Recycled Crafts:  Peeps bag topper
Show all your peeps they are loved with the free peeps topper from Eighteen25.  Print, package and present, how easy is that?


Figured out what to do with your Peeps yet?  We'd love to see them when you do!

Until next time,
Sister #3

Go Get Crafty, Sister!

Sunday, March 18, 2012

Treasure Chest

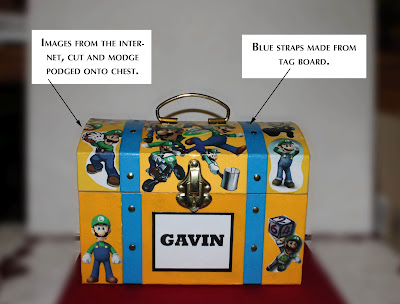
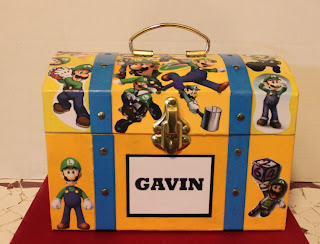
Pin It I know two little boys who have a great fascination with Mario and Luigi.  From blankets to t-shirts to video games, they love them all.  So, when I saw these cute Paper Mâché treasure chests on sale at Hobby Lobby for 50% off, I couldn't resist snapping them up in hopes of turning them into something those two little boys would treasure.


All it took was some some paper scraps, images from the 'net, a tub of Modge Podge, and a pair of sharp scissors.


Recycled Crafts:  Modge podge treasure chest tutorial, step 1 


Recycled Crafts:  Modge podge treasure chest tutorial

Recycled Crafts:  Modge podge treasure chest tutorial


Recycled Crafts:  Modge podge treasure chest tutorial
Pin It

Recycled Crafts:  Modge podge treasure chest tutorial
Top


Recycled Crafts:  Modge podge treasure chest tutorial
Back
Thanks for looking!
Until next time--
Go Get Crafty, Sister!
Sister #2


Tuesday, March 13, 2012

The Great Apron Search

A friend of mine loves aprons--she wears one almost every day and loves to change them out with new and different patterns.  Her birthday is coming up, and because I love to give gifts from the heart, I went searching for just the right apron to make.  Here are a few I stumbled across, complete with tutorials:


Recycled Crafts:  holiday apron
Pin It Jona's Holiday Apron-in-an-Hour at Stop Staring and Start Sewing includes a down-loadable pdf.
Recycled Crafts:  ruffled apron
Pin It I  couldn't find the original designer of this beautiful apron, but here is a link to the instructions at Spotlight.com.au.Rows and rows of ruffles.
il_430xN_63297381
Pin It Vintage pillowcase apron by Laura at Decor to Adore includes a video tutorial.


Handmade Apron
Pin It Mini retro apron by Jill at Homemade by Jill
Mini Retro with Ruffles Apron
Pin It Mini retro with a ruffle by Stephanie from The Petite Sewist. Her tutorial was featured by Jenny over at Days of Chalk and Chocolate.


Ruffled Apron with Embellished Pocket
Pin It Mandy over at Sugar Bee Crafts created this apron as a gift for her mom--super cute with ruffle and embellished pocket!
denim apron
Pin It Mommy Knows created this apron based on directions from sew simple magazine.   She claims to sew like a drunk driver, but I absolutely adore it!
I still haven't decided which one I'll ultimately make myself.  What do you think?  Have you created an apron that would make a great gift for an apron lover?  Let me know!

Until next time, 
have a great day, and 
Go Get Crafty, Sister!
~Sister #1
Related Posts Plugin for WordPress, Blogger...
Those Crafty Sister are 
ready to create a unique upcycled, 
recycled, craft gift or teach you 
basic diy craft skills. Join us 
at http://thosecraftysisters.blogspot.com/, 
our craft blog where you can see what 
we've been crafting and sharing lately.
Pin It