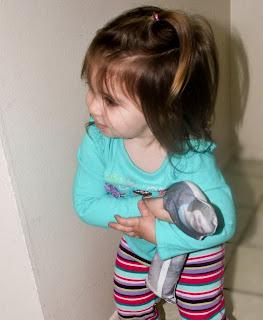
I may have mentioned that we have a little visitor for a few months - a beautiful 21-month-old whose Mommy is deployed in the Middle East, and whose daddy is in training with the Navy. She misses her mommy and daddy very much, and I decided I would make her some Mommy and Daddy pillow dolls to love on.
This also gave me the opportunity to try my hand at a craft I've been wanting to experiment with: printing on fabric.
The first step was opening the images in Photoshop and getting rid of the background. This can be done in any photo editing software. Once the background was removed, I was ready to print.
I opened a new file set at my print size and pasted my first image into it. I am fortunate enough to have a large format printer - it will print up
to 13 x 19. I cut out a poster board large enough to fit and fixed the
fabric to the poster with tacky spray.
I was very pleased with the way it turned out! I used the "glossy photo" setting, and the fabric I used was an old white sheet I cut to size.
After the first print, I realized I could get two images on one panel.
The black lines are what happened when I thought I had all the wrinkles smoothed out. If you look closely you can see black fuzzies surrounding the image. I'm not really sure what that's from. It was actually worse on the first print, but it shouldn't be noticeable on the final product.
After printing, I placed the printed fabric on top of the backing fabric and cut around the edges, giving it about a 3/4" border.
Next I pinned the front to the back. I wanted to sew around the edges of the body, and I thought I could easily do that since the images could clearly be seen from the back. Next time, however, I will draw around the edges first - areas like skin and light colored clothing were hard to make out when I actually had it on the machine.
I sewed the edges twice, since this would be handled by a toddler, leaving the bottoms open for turning. Then I trimmed the excess fabric and snipped the corners and curves.
After sewing, I turned the pillows right side out, stuffed them with fiber fill and sewed the bottoms closed. They looked out of proportion, and I realized I should not have sewn right up against the edges. Instead, I should have left about a quarter inch around to allow for the stuffing to spread out the sides. Oh well, I'll know better next time.
Next came the true test for success:
Even though I thought they were far from perfect, I don't think she cared!
She carried them around the house like long lost friends, and loved to hug and kiss them and push them around in her buggy. :)
Time very well spent.
Thanks for looking, and until next time...
Go Get Crafty Sister!
Sister #2
Go Get Crafty Sister!
Sister #2


That was super sweet of you! How nice for her to have them.
ReplyDeleteThanks SO MUCH for sharing this on Sweet Sharing Monday- you got a lot of clicks ad were featured this week! http://saynotsweetanne.com/2012/sweet-sharing-monday-wrap-up-2/ Come on by and grab your button!
ReplyDelete