Pin It A few weeks ago I blogged about my secret love for vintage suitcases, and posted a photo of a suitcase I had recently acquired.
Since then I have been working hard to turn that hot pink baby into a portable "Beading Station" for my jewelry making. I hesitate to actually call it "making," since my main contributions to this hobby have only been "making repairs" and especially "making purchases." But soon that will no longer be the case! (Get it? Case? Hyuck hyuck. :)
Here's a quick look at the finished product:
 |
| Pin It Retro Suitcase Beading Station |
Before I start, you have to take a look at what I was dealing with:
 |
| A huge pile of jewelry making stuff--boxes upon boxes! |
And here is how the transformation went:
 |
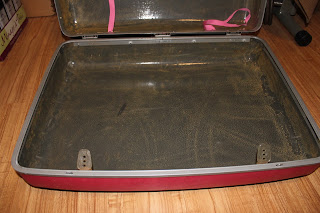
In the pictures it doesn't look too bad, in real life it was tattered and torn. This all had to come out.
(FYI, check back in a few days to see what I did with the elasticized pocket!) |
 |
My handy Skil Cutter--love this thing!
It cut through the thick cardboard flap as well as the cardboard
covered trim around all the edges. |
 |
After the flap and edging, the fabric was easy to rip out. (I should have used a mask to keep from breathing in the completely disgusting buildup of dust and who-knows-what-else that had accumulated underneath...)
|
 |
Then came the cleaning and scraping, lots of cleaning and scraping.
|
 |
| Next
came a tube of industrial strength glue, a bunch of old parquet tile
leftover from a project, and a bunch of business letterhead paper wasting space in my paper box. |
 |
I used some more glue on the back of a magnet strip I had bought from Ikea. (fyi, this is actually supposed to be a knife rack for the kitchen. I do use one in the kitchen... and three in my studio.)
|
 |
And...viola!
Problem was:
I HATED IT!!!! |
Too brown, too blah, too yuck!
I agonized over it a couple of days, and then I knew I had to make a decision:
Should I keep going, or should I rethink this project?
I really hated it. It was so UNINSPIRING!
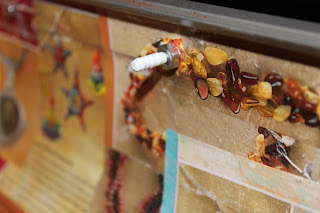
So I broke out some old beading magazines and started cutting and pasting again.
|
|
Pin It And just like that (actually it was a couple more hours of work)
I went from hating it to loving it!
|
Now I was ready to finish the project:
|
|
|
I inserted two nuts and bolts to hold up a removable
work "table" that would span the depth of the case, and
wrapped the ends in plumbers tape to prevent scratches.
|
|
|
One of the brackets that had held up the cardboard flap I left in place.
It would hold up the other side of the table.
|
|
|
I also papered the table (a piece of thin plywood) with more magazine pictures.
|
|
|
Tubes attached with Velcro will hold beads.
|
|
|
Heavy duty Velcro holds two plastic organizers in place.
More Velcro holds a round metal plate (which is actually the top of a cookie tin)
that can be left in place as a magnet board or be removed to use during projects.
The magnet bar holds metal containers for storing larger beads and charms
as well as tools being used during projects.
Boxes in the bottom have clear tops for easy identification.
|
|
|
And here she is with the worktable in place. This is going to be so awesome to use!
|
Well, what do you think? Was it worth the time and effort?
After a few projects, I'll let you know. ;)
Until next time,
Go get crafty, Sister!


 Robin at ROBINS NESTING PLACE made this DIY Potting Bench


