Showing posts with label upcycle. Show all posts

Thursday, November 15, 2012

Garden Table


 While dumpster diving one day I came across this broken outdoor table.  There's a little spot in my garden that's crying for attention, and I thought I might be able to fix the table--it was only broken in one place!  However, when I got it home I realized that that "one place" was a pretty important place--so I needed to rethink my idea.  It sat in my garage waiting for my inspiration.


That inspiration came in the form of an old stool I had finally decided to send to the curb.  It was a  VERY old stool.  In fact, when I turned it over I found that the stool had originally belonged to my daughter back when she thought she had to label everything as her own.  (Maybe 12-13ish?)


She is now married with a daughter of her own! 

Anyway, here is how the project went:

First I lowered the legs to give the table stability, and to fit the size I had in mind.
Next I gave both the chair and the table a couple of coats of this textured paint I already had on hand. 
I'm not in love with the color, but it will have to do for now.


Next, I plopped the top onto the stool and drilled holes here and there through the stool. 
I fed a strand of strong wire through the holes from the top.


Then I turned it over and gave the wire a few strong twists and cut off the ends. 
(I'm kinda bummed I didn't think to leave my daughter's name.)
I turned it back over and gave the whole thing another coat of paint.

And here it is in its new home, ready to show off a few plants or, with a couple of chairs,
serve as a child's table at an outdoor dinner.
 I'm loving that I have a table just the right size I was looking for, and it was free to boot!
Until next time,
Go Get Crafty, Sister!
 ~Sister #2

Friday, September 21, 2012

Fall Flowers Cornucopia

Now that fall is just around the corner, I wanted to post a photo of a gift I received last year from my niece.  Following in her mother's footsteps, Erynne is a teacher and crafter extraordinaire!  She actually taught her students how to make this awesome cornucopia, and you'll never guess what it's made of--yarn and a paper plate!

Now to get her in here to do a tutorial for us!

Until next time,
Go Get Crafty, Sister!

~Sister #2

Sunday, August 12, 2012

Tile Planter


I've been stuck on succulents lately, since they're so easy to grow that even my black thumb can't kill them (at least most of them, that is).  So I wanted to make a few planters to bring some of them inside. I have an abundance of leftover tile from previous projects, so I decided to see if I could make good use of it. 

Here are the supplies I used:  premixed grout (love this stuff!), scrap wood, scissors, and of course, tile.  This tile won't really match my decor, but I have so much of this color (and it was only .05 each at the Habitat store) that if I totally screwed up, I wouldn't feel bad about tossing it.  And if it did work, I could always find another use for it.


First, I edged the tile with some of the grout.


Then applied one of the pieces of scrap wood.  The size of the scrap doesn't really matter, as long as it is wide enough to attach to two sides of the planter.

Here is a side view.  As you can see, I didn't use a huge amount of grout, but since the tile will be standing up, I needed to use a bit more than I would if the tile were to be laying flat.

Next I used the grout to attach another scrap.

Then I did the same with another tile and allowed them to dry overnight.

Next I took a third tile and applied the grout to two sides.

I stood that tile next to one of the tiles with scrap and pressed them together.

Then did the same with the second prepared tile.

I applied grout to the fourth tile the same as the third and attached it to complete the box.

Although the box could now stand on its own, the sides were not completely grouted, but I'll get to that in a bit.

Next I created the bottom of the box.  I applied grout to four corners,

and placed it on "top," (which, of course, will later be the bottom).  After pressing the edges together I ran my finger along the seam to smooth it out.  All the edges now, though, will need an additional layer of grout to smooth and seal the edges.

For this application, I took just a small bit of grout

and applied it to the seam.

Then ran my finger over it to smooth it out.

Here is the planter after all the edges have been completely grouted and smoothed.  I also wiped away the excess grout that had found its way to the surface of the tile (bad grout!).   FYI, if you ever have dried grout on your tile, use a Popsicle stick to scrape it off--no scratches.

And here it is with a fake Ikea pretty plant. Now that I know it can be done, I feel more confident about using some of my more expensive tile that will actually match my decor, lol.

Thanks for looking,
and until next time,
Go Get Crafty Sister!
~Sister #2


Wednesday, August 8, 2012

Easter Basket Upcycle


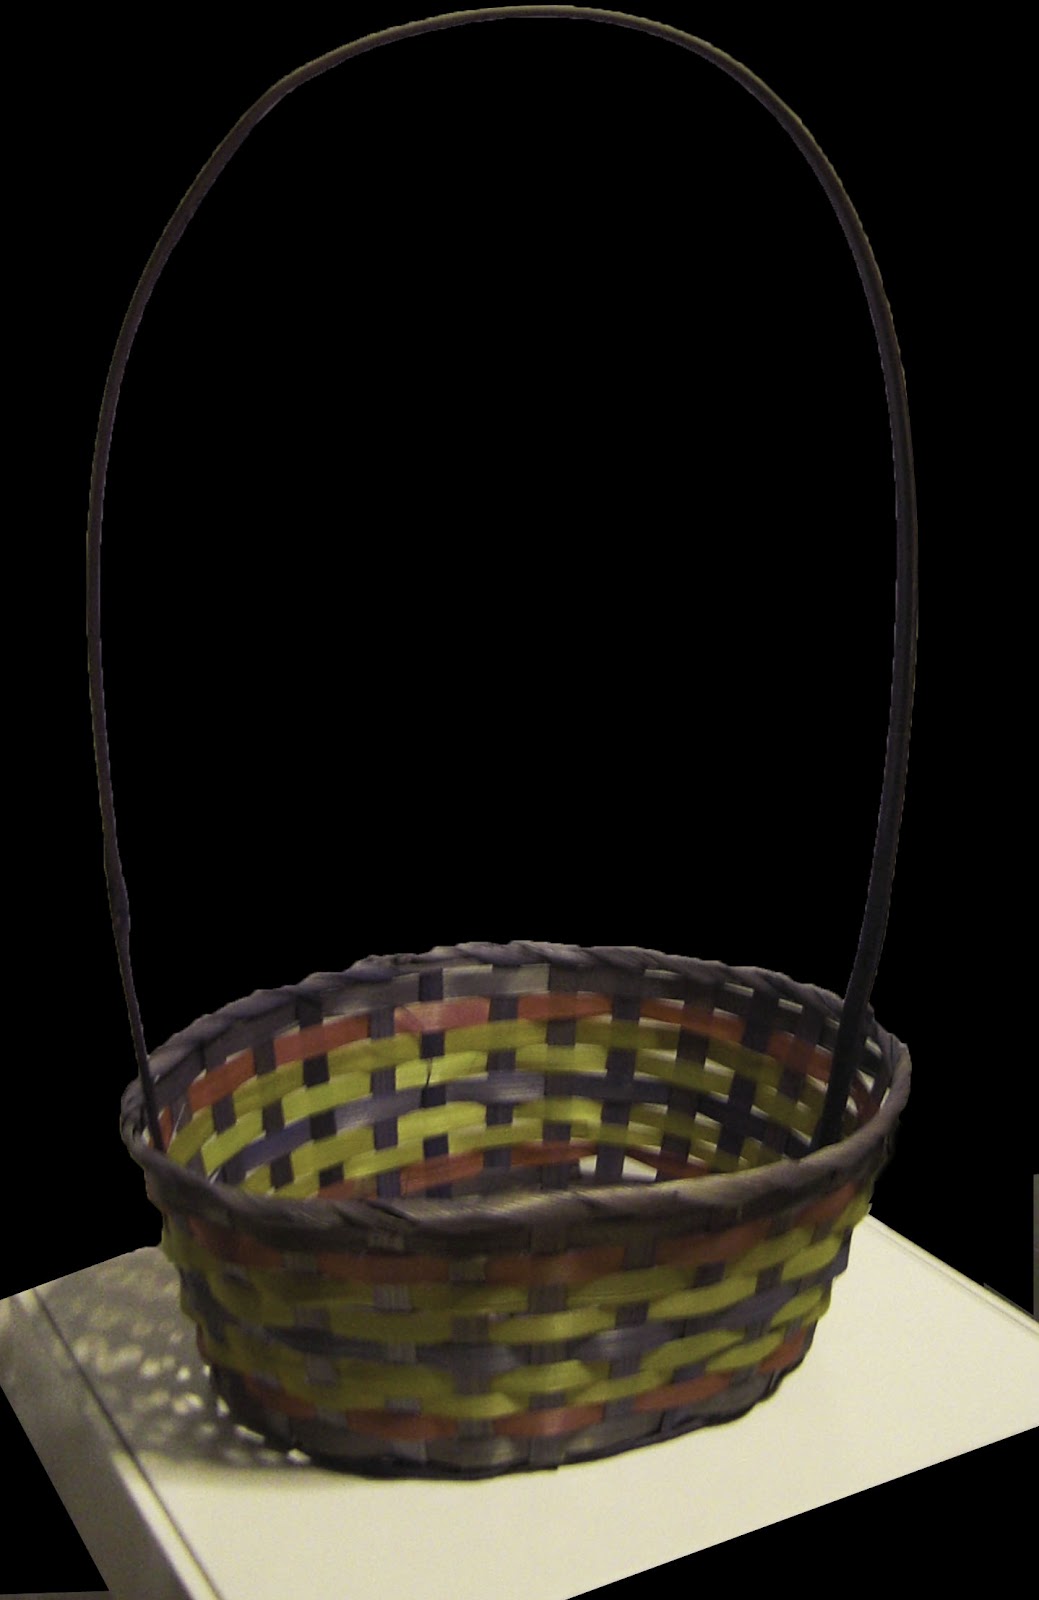
I was co-hosting a baby shower recently and needed a small container to hold the game prizes.  I wanted something that the new mother might be able to use later, so I looked around my junk room studio and spied a leftover basket from last Easter.  This is why it's so hard to throw/gift things away--they can always be upcycled into something else!

This was a simple upcycle.  The handle was just glued in, so after a little wiggling it pulled right out.

Next came a coat of baby blue paint.

And finally, some beads to finish it off.  I threaded the beads onto some string, then pulled the string through to the inside and tied it off.

For a fast project (completed the night before the shower, lol) I think it turned out super cute.

Thanks for looking, and until next time,
Go Get Crafty Sister!
~Sister #1


Sunday, July 29, 2012

Altered T-shirt Tutorial


This tutorial will show you how to alter a man-shaped boxy t-shirt to create a more curvy feminine shirt minus the horrible neckband and baggy sleeves.  The tutorial will take you through the steps to prepare the shirt for sewing.  

When you are choosing your man-sized boxy t-shirt, make sure to choose one that is loose all over.  This is very important if you are not an experienced sewer- or alterer-type person.  In this tutorial, I have used a shirt that does fit me around the hips, but I show you how to do it both ways.

Disclaimer:  all photos were taken with a phone, so please don't judge my photography abilities by what you see here.  I'm using the same shirt throughout the tutorial, but the lighting made the coloring different in some of the pictures.  In the interest of getting this up in a timely manner, I have not tried to correct the colors.  

What you need:  Start by finding a shirt that you like and that fits you well.  This will be the template for your new shirt.  You will also need some chalk, about 10 safety pins, a whole bunch of straight pins and an iron.


 Turn your large t-shirt inside out and lay it on a flat surface.


  Place your template t-shirt on top.  Line up the template shirt with the big shirt at the shoulders.  You will not be cutting
the shoulders off.


With the chalk, draw a line about an inch away from the template t-shirt all around the big shirt,
except for the shoulders and neck.

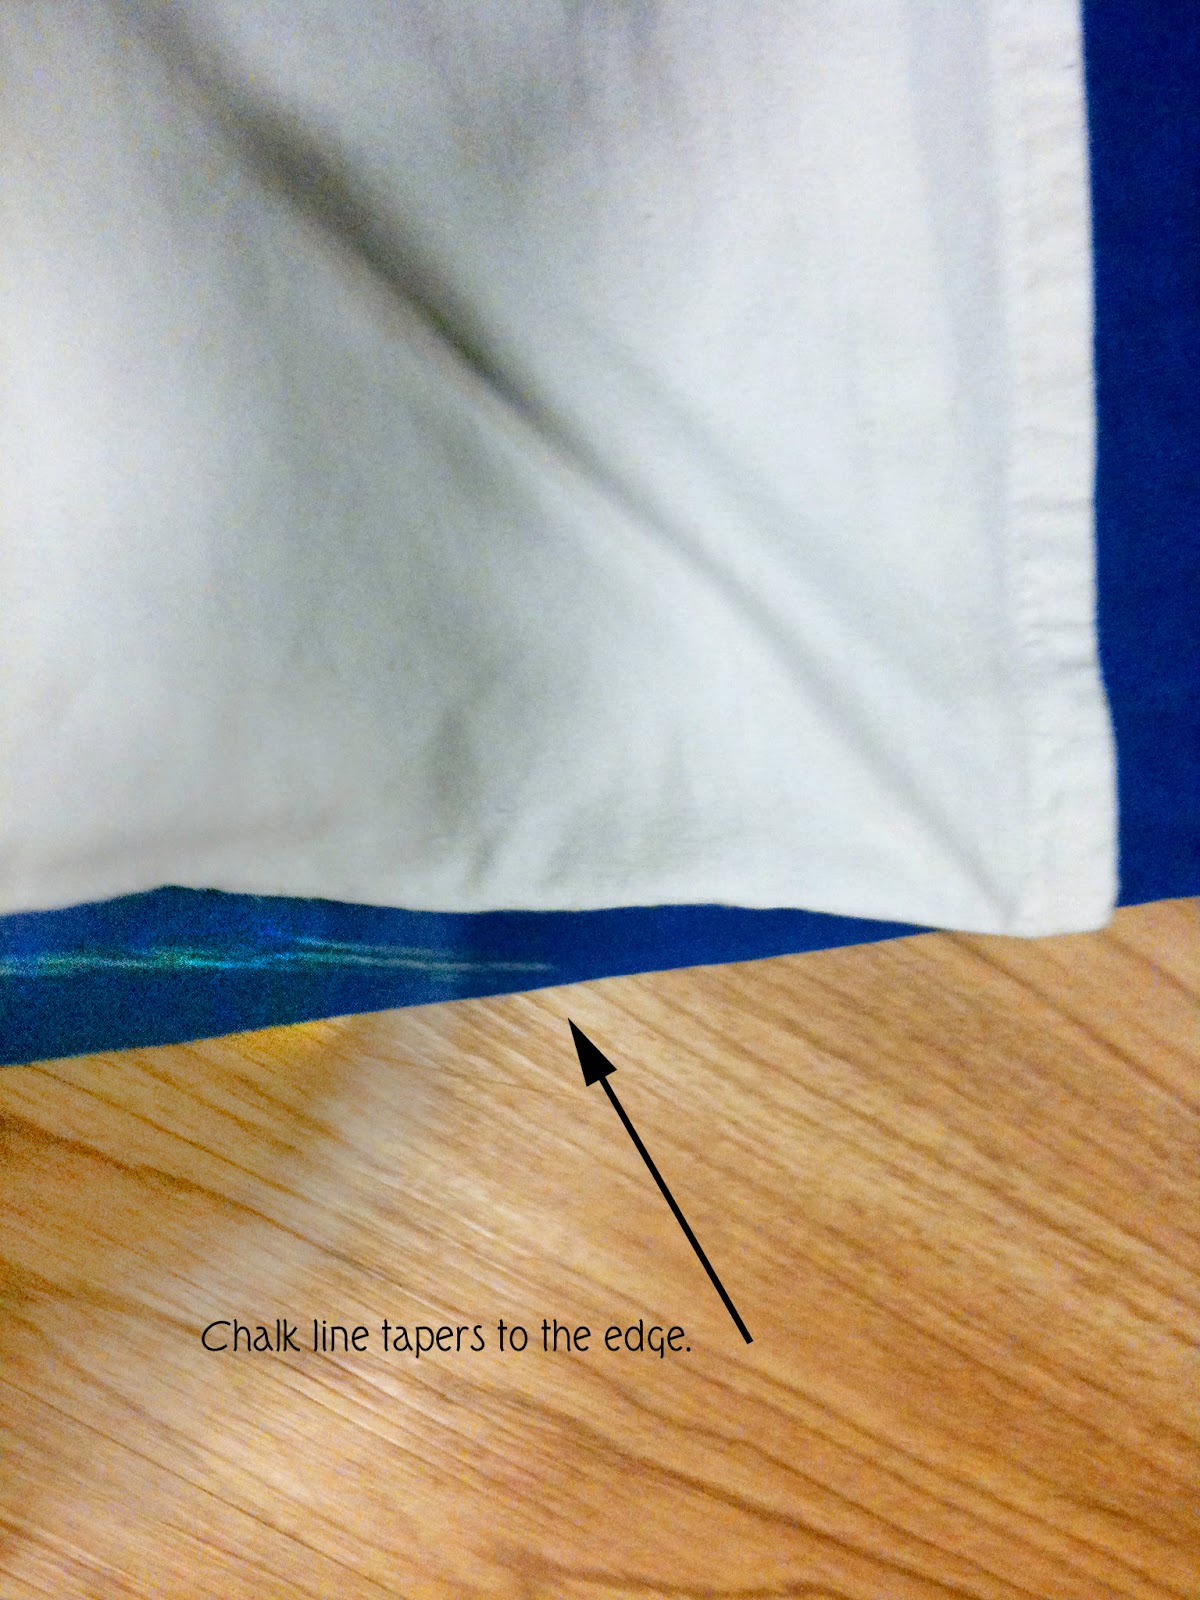
If the man-shirt fits you around the hips, your  template t-shirt will cross the width of the large t-shirt like mine did in the picture above, so just taper the chalk line like I did.  If it does not, just continue your chalk line down to the hem like the picture below.


For the hem, you want to draw the line about three inches from the hem of your template t-shirt.  I know mine doesn't look like three inches, but I had to compensate for the curve in the template t-shirt.
Note:  it's ALWAYS better to make the shirt longer rather than shorter, because you can always adjust the hem to make it shorter later.  It's a little hard to make a short shirt longer :)

Take the template t-shirt off and your big t-shirt should look like this.  

Use a ruler to make sure your lines are the same distance from the
original hem on each side.


Do the same thing with the hem.  Adjust the chalk line if necessary.  .)


Mine was a little off, so I adjusted it for a straighter hem.

  Note:  To "erase" a chalk line, just use a damp washcloth (or wet your finger and rub the shirt, like I did)


Use safety pins to pin the sides of the shirt.

Carefully cut the neck off, right below the seam line.

You will need to cut the tag off as well.

Cut the sleeves and the bottom along the chalk lines, cutting through both sides of the shirt.  Do not cut the sides yet.

Try the shirt on, inside out, making sure the sides fit the way you want.  If not, take it off, lay it flat, and draw a new chalk line before taking out the safety pins.  Once your line is drawn, then move the pins. 
Keeping the shirt inside out, use a ruler to turn up the bottom hem 1 1/2 inches.

Use an iron to press the hem flat.


Bring the fold of the hem up to meet the raw edge and iron again.


Turn the fold up one more time.

Note:  It really doesn't matter how you turn up your hem, you just want to make sure you fold it over at least three times to make the hem heavy enough not to curl up while you're wearing it.

Pin the hem with the points  of the pins pointing toward  the shirt.  This will make it easier to remove the pins during sewing.
Place a pin every couple of inches.


At this point, try the shirt on (very carefully) to check the length.

Use the same process to hem the sleeves.  The hem for the sleeves does not have to be as large--about 1/4 - 1/2 inch.  You don't necessarily have to fold this over three times, but it won't hurt.


Pin the shirt hem the same as before, with the point of the pin going toward the shirt.

Fold over and iron a narrow hem for the neckline.

You will notice that the neckline will not want to stay flat.  You will need to clip the curves.

Clip the curves by making a small cut every one to two inches.  Iron flat.  It looks  like I made sort of a triangle cut here, but it is only one small cut.  When you iron the hem, the cut will spread to look like this in order to allow the hem to lie flat.


Fold the hem over one more time and iron.  Because the neckline will be narrower than the other hems, you will want to place the pins along the neckline instead of perpendicular to it.

You are now ready to sew the seams.  
Sew all the seams using a ball-point needle with a closely-spaced, shallow zigzag setting (I set both at #2).  For the side seams, sew a second seam that crosses over the first.  Wait to cut the side until after you have sewn the seams.  Then, clip the curves just like you do in the step for the neckline.  This will allow the fabric to curve where you want it to curve.


That's it!  Turn your t-shirt right side out and wear with pride!


Until next time, 
Go Get Crafty Sister!
~Sister #2
Related Posts Plugin for WordPress, Blogger...
Those Crafty Sister are 
ready to create a unique upcycled, 
recycled, craft gift or teach you 
basic diy craft skills. Join us 
at http://thosecraftysisters.blogspot.com/, 
our craft blog where you can see what 
we've been crafting and sharing lately.
Pin It