This tutorial will show you how to alter a man-shaped boxy t-shirt to create a more curvy feminine shirt minus the horrible neckband and baggy sleeves. The tutorial will take you through the steps to prepare the shirt for sewing.
When you are choosing your man-sized boxy t-shirt, make sure to choose one that is loose all over. This is very important if you are not an experienced sewer- or alterer-type person. In this tutorial, I have used a shirt that does fit me around the hips, but I show you how to do it both ways.
Disclaimer: all photos were taken with a phone, so please don't judge my photography abilities by what you see here. I'm using the same shirt throughout the tutorial, but the lighting made the coloring different in some of the pictures. In the interest of getting this up in a timely manner, I have not tried to correct the colors.
What you need: Start by finding a shirt that you like and that fits you well. This will be the template for your new shirt. You will also need some chalk, about 10 safety pins, a whole bunch of straight pins and an iron.
|
|
Turn your large t-shirt inside out and lay it on a flat surface.
|
|
|
Place your template t-shirt on top. Line up the template shirt with the big shirt at the shoulders. You will not be cutting
|
|
|
With the chalk, draw a line about an inch away from the template t-shirt all around the big shirt,
except for the shoulders and neck.
|
|
|
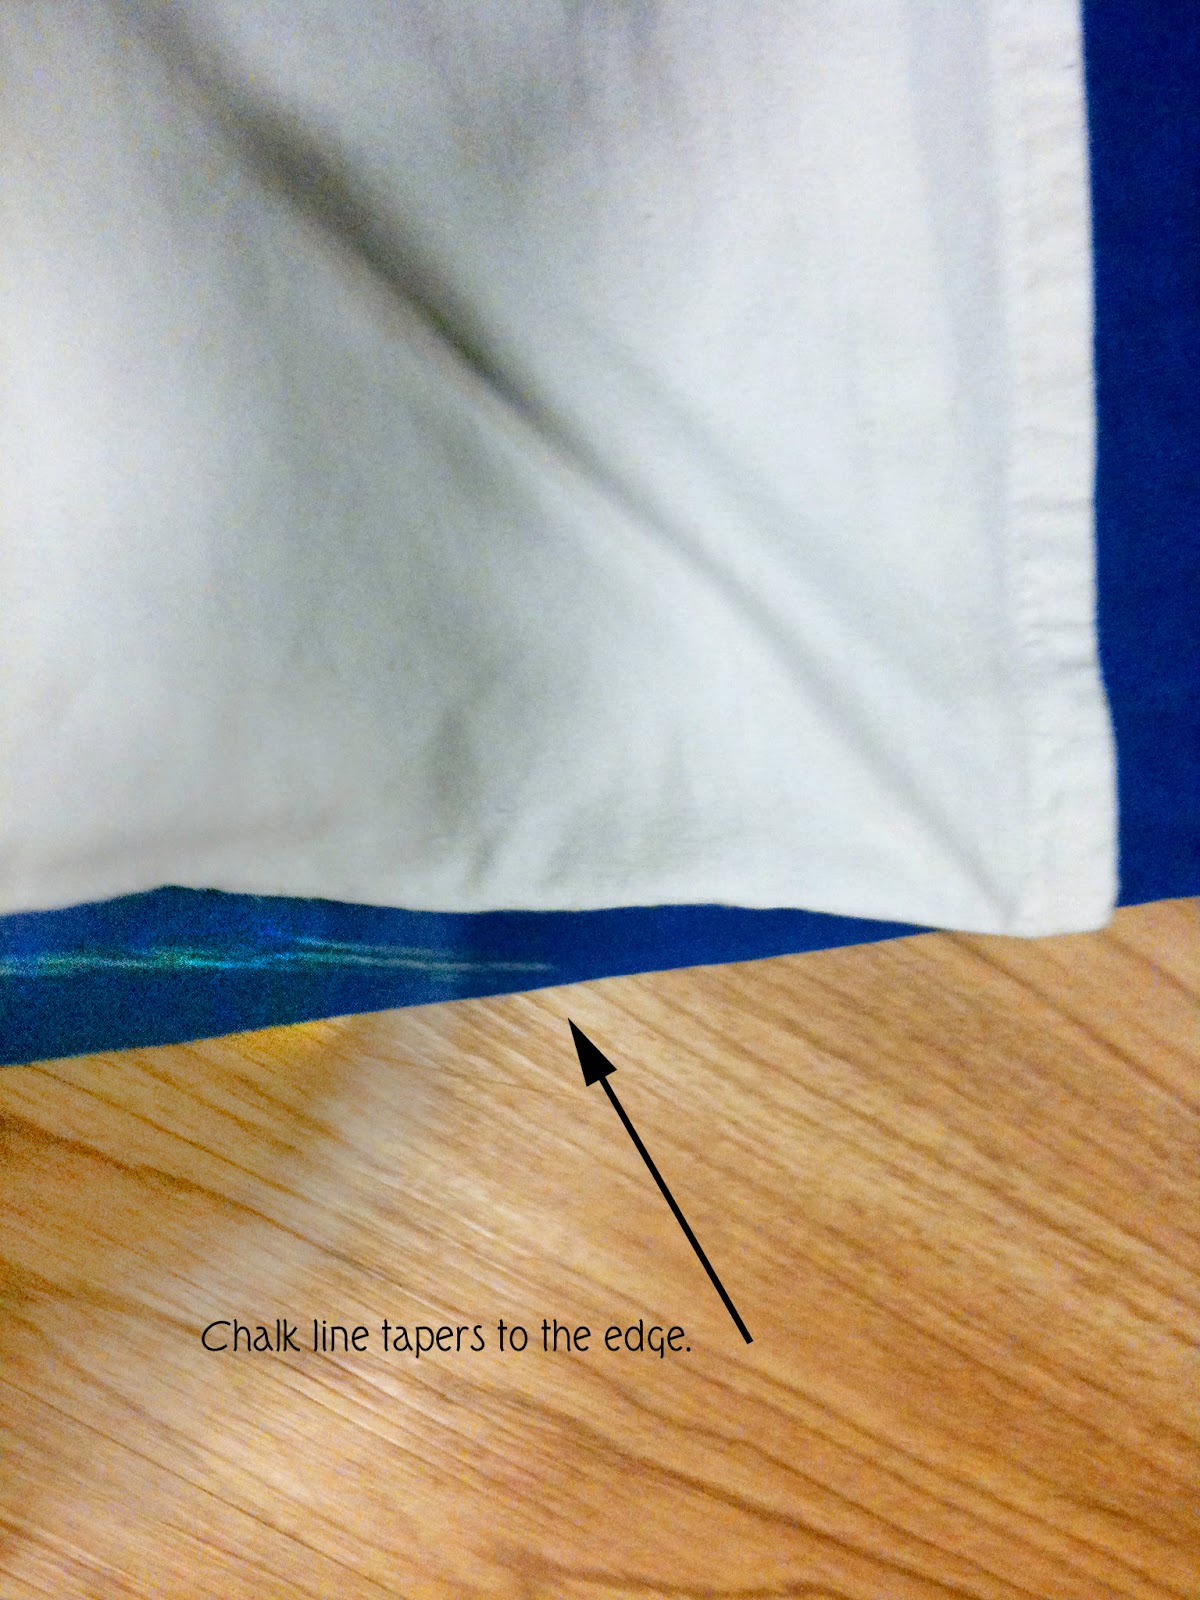
If the man-shirt fits you around the hips, your template t-shirt will cross the width of the large t-shirt like mine did in the picture above, so just taper the chalk line like I did. If it does not, just continue your chalk line down to the hem like the picture below.
|
|
|
For the hem, you want to draw the line about three inches from the hem of your template t-shirt. I know mine doesn't look like three inches, but I had to compensate for the curve in the template t-shirt.
Note: it's ALWAYS better to make the shirt longer rather than shorter, because you can always adjust the hem to make it shorter later. It's a little hard to make a short shirt longer :)
|
|
|
Take the template t-shirt off and your big t-shirt should look like this.
|
|
|
Use a ruler to make sure your lines are the same distance from the
original hem on each side.
|
|
|
Do the same thing with the hem. Adjust the chalk line if necessary. .)
|
|
|
|
Mine was a little off, so I adjusted it for a straighter hem.
Note: To "erase" a chalk line, just use a damp washcloth (or wet your finger and rub the shirt, like I did)
|
|
|
Use safety pins to pin the sides of the shirt.
|
|
|
Carefully cut the neck off, right below the seam line.
|
|
|
You will need to cut the tag off as well.
|
|
|
Cut the sleeves and the bottom along the chalk lines, cutting through both sides of the shirt. Do not cut the sides yet.
|
|
|
Try the shirt on, inside out, making sure the sides fit the way you want. If not, take it off, lay it flat, and draw a new chalk line before taking out the safety pins. Once your line is drawn, then move the pins.
|
|
|
Keeping the shirt inside out, use a ruler to turn up the bottom hem 1 1/2 inches.
|
|
|
Use an iron to press the hem flat.
|
|
|
Bring the fold of the hem up to meet the raw edge and iron again.
|
|
|
|
Turn the fold up one more time.
|
Note: It really doesn't matter how you turn up your hem, you just want to make sure you fold it over at least three times to make the hem heavy enough not to curl up while you're wearing it.
|
Pin the hem with the points of the pins pointing toward the shirt. This will make it easier to remove the pins during sewing.
|
|
|
Place a pin every couple of inches.
|
|
|
At this point, try the shirt on (very carefully) to check the length.
|
|
|
Use the same process to hem the sleeves. The hem for the sleeves does not have to be as large--about 1/4 - 1/2 inch. You don't necessarily have to fold this over three times, but it won't hurt.
|
Pin the shirt hem the same as before, with the point of the pin going toward the shirt.
|
|
Fold over and iron a narrow hem for the neckline.
|
|
|
You will notice that the neckline will not want to stay flat. You will need to clip the curves.
|
|
|
Clip the curves by making a small cut every one to two inches. Iron flat. It looks like I made sort of a triangle cut here, but it is only one small cut. When you iron the hem, the cut will spread to look like this in order to allow the hem to lie flat.
|
|
|
Fold the hem over one more time and iron. Because the neckline will be narrower than the other hems, you will want to place the pins along the neckline instead of perpendicular to it.
You are now ready to sew the seams. Sew all the seams using a ball-point needle with a closely-spaced, shallow zigzag setting (I set both at #2). For the side seams, sew a second seam that crosses over the first. Wait to cut the side until after you have sewn the seams. Then, clip the curves just like you do in the step for the neckline. This will allow the fabric to curve where you want it to curve.
That's it! Turn your t-shirt right side out and wear with pride!
Until next time,
Go Get Crafty Sister!
~Sister #2
|
|