Showing posts with label print on fabric. Show all posts

Tuesday, October 2, 2012

Iron-On Wall Portraits

Renters and minimalists rejoice, for today you will learn how to take those photos that have been stuck in digital limbo and transform an entire wall (okay, maybe a small wall) into a photo gallery even your landlord can’t object to.  Using a $5 roll of fabric adhesive and your trusty iron, you can take your rented walls from ho-hum to a work of joy.  And when you're ready to move, these prints peel right off with no sticky residue or telltale nail-holes of horror.

 
  What you need:
  1. ·      Black and white or color untrimmed photos printed on standard paper
  2. ·      Iron-on lightweight fabric adhesive (like Wonder-Under or Heat 'N Bond)
  3. ·      Painters tape
  4. ·      Iron
  5. ·      Thick fabric or towel
  6. ·      Old pillowcase 


What you do:

1.  Cut a piece of fabric adhesive slightly larger than your photo.


2.  Lay thick fabric or towel on a hard surface, with photo face down on top.  Lay fabric adhesive, shiny side down, on top, so your photo is sandwiched between the thick fabric and adhesive.

 3.  Following the instructions that came with the adhesive, use your iron to fuse the adhesive to the back of your photo.  (If the idea of ironing paper scares you, cover your "sandwich" with the pillowcase before ironing.) 


5.    Trim your photo and peel off the adhesive backing.


6.  Lightly tape your photo in place on your wall and tape your pillowcase over the photo.  
7.  Using the same setting on your iron, fuse your photo to the wall.  If you have heavily textured walls, you may have to go over the fabric several times.  (Alternatively, you could fuse only the edges of your photo to decrease ironing time and minimize the amount of texture picked up by your photo.)
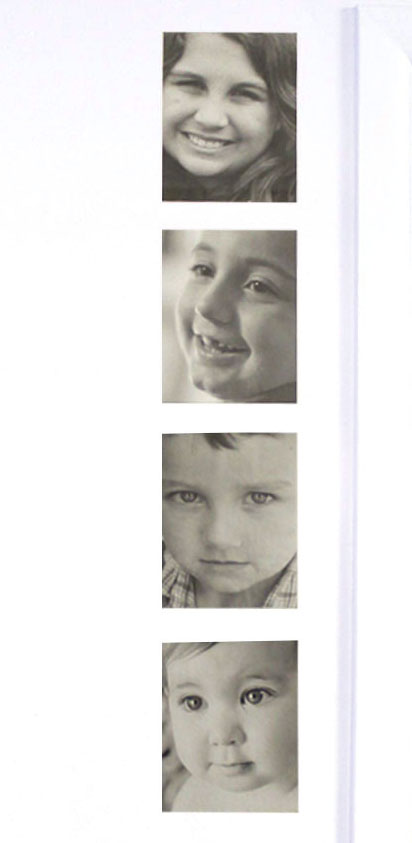
8.  That’s it!   Repeat with remaining photos and enjoy your wall!

But wait!  What if you want to remove it?


When you're ready to remove the photo, just peel it off.  If your iron was too hot when you ironed the image on, part of your photo might refuse to budge.  In that case, simply reheat with your iron to loosen the adhesive and continue peeling.

Sunday, March 25, 2012

Pillow Dolls: Mommy, Daddy & Baby


I may have mentioned that we have a little visitor for a few months - a beautiful 21-month-old whose Mommy is deployed in the Middle East, and whose daddy is in training with the Navy.  She misses her mommy and daddy very much, and I decided I would make her some Mommy and Daddy pillow dolls to love on.

This also gave me the opportunity to try my hand at a craft I've been wanting to experiment with:  printing on fabric.

Printed fabric dolls created in Photoshop:  picture of three people in Photoshop
The first step was opening the images in Photoshop and getting rid of the background.  This can be done in any photo editing software.  Once the background was removed, I was ready to print.  


Printed fabric dolls created in Photoshop: one girl
I opened a new file set at my print size and pasted my first image into it.  I am fortunate enough to have a large format printer - it will print up to 13 x 19.   I cut out a poster board large enough to fit and fixed the fabric to the poster with tacky spray. 


Printed fabric dolls created in Photoshop: girl on a piece of fabric
I was very pleased with the way it turned out!  I used the "glossy photo" setting, and the fabric I used was an old white sheet I cut to size.


Printed fabric dolls created in Photoshop: man and little girl on fabric
After the first print, I realized I could get two images on one panel.


Printed fabric dolls created in Photoshop: girls hand on fabric with black lines on the fabric
The black lines are what happened when I thought I had all the wrinkles smoothed out.  If you look closely you can see black fuzzies surrounding the image.  I'm not really sure what that's from.  It was actually worse on the first print, but it shouldn't be noticeable on the final product.


Printed fabric dolls created in Photoshop: cut outs of three people
After printing, I placed the printed fabric on top of the backing fabric and cut around the edges, giving it about a 3/4" border.


Printed fabric dolls created in Photoshop: cut outs pinned to back of fabric
Next I pinned the front to the back.  I wanted to sew around the edges of the body, and I thought I could easily do that since the images could clearly be seen from the back.  Next time, however, I will draw around the edges first - areas like skin and light colored clothing were hard to make out when I  actually had it on the machine.


Printed fabric dolls created in Photoshop: cut outs sewn in
I sewed the edges twice, since this would be handled by a toddler, leaving the bottoms open for turning.  Then I trimmed the excess fabric and snipped the corners and curves.


Printed fabric dolls created in Photoshop: three dolls
After sewing, I turned the pillows right side out, stuffed them with fiber fill and sewed the bottoms closed.  They looked out of proportion, and I realized I should not have sewn right up against the edges.  Instead, I should have left about a quarter inch around to allow for the stuffing to spread out the sides.  Oh well, I'll know better next time.


Next came the true test for success:
Printed fabric dolls created in Photoshop: girl playing with dolls
Even though I thought they were far from perfect, I don't think she cared!


Printed fabric dolls created in Photoshop: girl hugging doll

She carried them around the house like long lost friends, and loved to hug and kiss them and push them around in her buggy.  :)


Printed fabric dolls created in Photoshop: smiling girl squeezing doll
Time very well spent.

Thanks for looking, and until next time...

Go Get Crafty Sister!

Sister #2


Sweet Anne Designs
Related Posts Plugin for WordPress, Blogger...
Those Crafty Sister are 
ready to create a unique upcycled, 
recycled, craft gift or teach you 
basic diy craft skills. Join us 
at http://thosecraftysisters.blogspot.com/, 
our craft blog where you can see what 
we've been crafting and sharing lately.
Pin It