Showing posts with label Just Plain Fun. Show all posts

Friday, November 16, 2012

Turkey Tutu

Pin It
Recycled crafts:  toddler tutu
Sweet little girl with Turkey Onesie and tutu.  From start to finish, two hours, tops!
A few weeks before Thanksgiving, right about the time I discovered Pinterest, I stumbled across the photo below and knew I had to make one (the outfit, not the baby, lol)! I love how it turned out.

Recycled crafts:  toddler tutu

How To:

Supplies:
  1. Turkey Pattern (see below)
  2. Onesie
  3. 1 yard each of orange, yellow and ivory tulle
  4. Ribbon and fabric scraps
  5. Wonder Under
  6. Optional:  Fabric paint, needle and thread or sewing machine
  7. The following tutorial:  How to Make a Tutu No Sew 

Steps:
  1. Enlarge or reduce the pattern to fit the onesie
  2. Cut one body, one beak and six wings out of your chosen fabric.
  3. Follow the directions on the Wonder Under to apply the turkey to the onesie.
  4. Optional:  Use fabric paint to outline the turkey, or sew a zigzag stitch around the edges of each pattern piece.
  5. Watch and follow along with the video on making the tutu, using the tulle and ribbon
  6. Dress a cute baby in the outfit and bring on the smiles!


Recycled crafts:  toddler tutu:  turkey pattern


There are all kinds of tutus on Pinterest; many are on my mental "to do" list.
Here are some of my favorites:

Recycled crafts:  toddler tutu:  snowbaby
Snowbaby


Until next time,
~Sister #2

Friday, September 21, 2012

Fall Flowers Cornucopia

Now that fall is just around the corner, I wanted to post a photo of a gift I received last year from my niece.  Following in her mother's footsteps, Erynne is a teacher and crafter extraordinaire!  She actually taught her students how to make this awesome cornucopia, and you'll never guess what it's made of--yarn and a paper plate!

Now to get her in here to do a tutorial for us!

Until next time,
Go Get Crafty, Sister!

~Sister #2

Sunday, August 5, 2012

"Iron-on" Tile Coasters

This tutorial was feature a few weeks ago over at Free Time Frolics:

Iron-On Tile Coasters
Here's the deal:  You're at a rockin' party, dressed to the nines, jammin' with the music, a drink in one hand and fist bumpin' your favorite peeps with the other.  You're halfway through the room when you spy the buffet table, piled so high with delish free food that you're going to need both hands to hold your plate.  Here in lies the problem--what to do with your drink.  Set it down on the food table where someone's peeled shrimp might take an unexpected dive?  Carefully sandwich it under your arm and hope none of the margarita salt rubs off on your Armani silk shirt?  Or leave it on the carefully polished coffee table and chance the wrath of your host by leaving a tell-tale ring?

No worries, my friend, because mankind long ago came up with the answer.  No, it's not the beer drinker's helmet or the 6-pack holster--I'm talking about that age-old denotation of ultimate sophistication:  the coaster.

And today I'm going to show you how to make that coaster the envy of all those purveyors of sophistication, by personalizing it with your own photos.  And we're not just going to cut them out and slap them on with a little white school glue--we're going to use heat transfer.

We've all seen tile coasters, either decorated or painted or decoupaged with photos.  Maybe you even created some last year for Christmas as a kid.  I really thought I'd exhausted the different ways to decorate the common bathroom tile, but when I read about transferring photos to tile using iron on's, I couldn't wait to try it!

What you'll need:

  1. 4" x 4" Tile:  This works easier with unglazed tile, but colors are brighter with glazed.  (I sanded the glazed tiles before transferring the photo.)
  2. Photo transfer paper
  3. Tape
  4. Iron
  5. Water-resistant sealer
  6. Cork or felt tabs


1.  Print your photo on the photo transfer paper, following the manufacturer's directions.  Cut around your image leaving a 1/2" border.  Tape it upside down to the edge of the tile.  This will help to keep the photo from slipping.


2.  Preheat the iron using the highest setting (don't use steam!) and fold the photo back away from the tile.

3.  Heat the tile:  working on a protected surface, and using gloves to protect your hands from the hot tile, place your iron onto your tile for 1 minute.


4.  Carefully flip the photo over onto the tile.  Since the transfer paper smears easily when hot, you need to tack the transfer first by lightly gliding the tip of the iron across the back two or three times.


5.  Iron it down:  Using firm pressure, (and being careful not to move the transfer) iron the paper to the tile.  Go back and forth, pressing firmly around all the image.  Make sure to do the edges really well, because that's the area that seems to have the hardest time with the transfer.  When you are finished, set the timer for one minute and do some deep breathing or something.  You don't want to take the paper off too soon, but you also don't want to leave it on too long or the paper will get stuck to the tile.  (If that happens, heat the paper again and you should be able to get it off.)


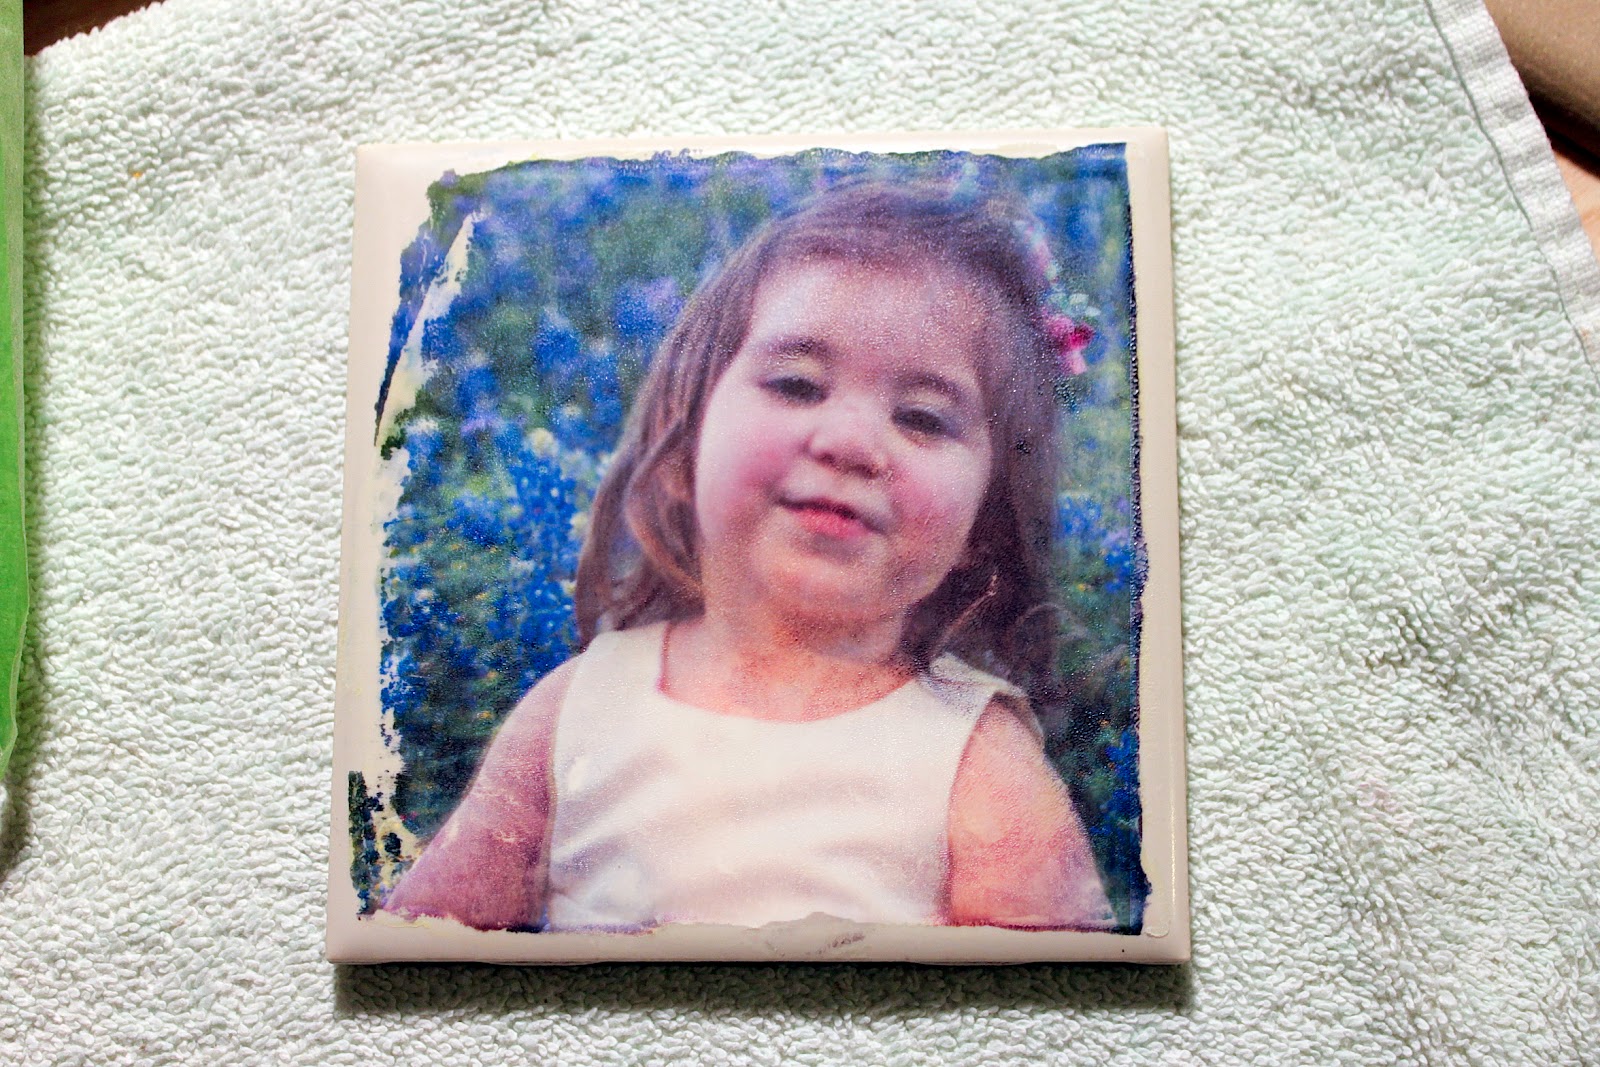
You can see that the edges do not come off sharp and crisp, and the image has sort of an aged look to it, but I think that only enhances the end result.


6.  Wait till the tile completely cools (at least 10 to 15 minutes), then seal the tile using 2 to 3 coats of sealer.
7.  Attach cork or felt to the bottom.

I just love the look of this!  I can see a whole row of tiles lined up across a backsplash or several grouped together in a frame.  I'm planning on making a tile planter for a friend, and I'm definitely going to incorporate this technique.

If you like this project idea, you would love the book that I got the idea from.  There are 50 projects, and they're not your regular run-of-the-mill projects either!  Just a few I plan to try:  mirror frame, plexiglass accordion frame, rice paper screen and even a shower curtain! I don't usually purchase real hold-in-your-hands books for diy stuff any more, (that's why we have the internet, right?) but in this case I'm glad I broke down and got it.


Until next time,
Go Get Crafty Sister!
~Sister #2


Thursday, March 22, 2012

Lovin' Our Peeps!

We love our Peeps, and we love creating fun Easter decorations, so you gotta know we LOVE creating Easter decorations with our Peeps!  Here is just a sampling of the cutest ones we've found so far, and of course, they all include the How To's:


Recycled Crafts:  Peeps on a stick
Oh, my, I will be putting these Peep Pops by Sugar Swings on my "to eat do" list!

Recycled Crafts:  Peeps on a wreath
Yum!  The Peeps over at Stampin' Mamas created this Peep wreath and a very well-written tutorial.  It uses an embroidery hoop, so you can make it in different sizes.

Recycled Crafts:  Peeps on a wreath
Peep-a-Boo Wreath from Tried & True--another great tutorial with clear instructions and good photos.  She also shows alternate designs in her updated wreaths.
 
Recycled Crafts:  Peeps topiary
Little Grow Peeps from Woman's Day.  I can't wait to make this one!


  Not just one tutorial, but a whole book of 'em!
Peeps: Recipes and Crafts to Make with Your Favorite Marshmallow Treat


Recycled Crafts:  Peeps centerpiece
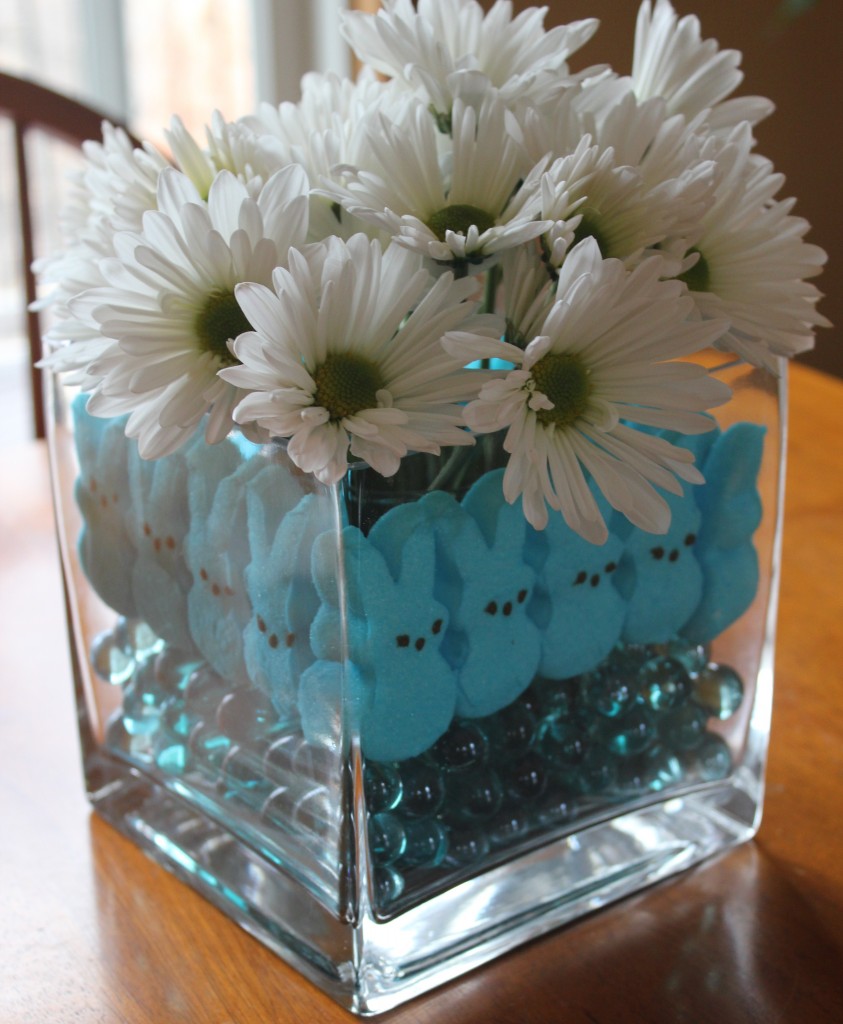
Beautiful Peep Centerpiece from Mommy Savers.  Since a good part of the supplies are from the dollar store, you can make this for under $10!
Recycled Crafts:  Peeps cake
The peeps over at Babble created this awesome Peep Sunflower Cake.  A Peep with every slice!
Recycled Crafts:  Peeps topiary
Topiary by Homespun Candle Momma - it looks difficult, but after checking out the tutorial, it is definitely in my skill range {easy!}.
Recycled Crafts:  Peeps plushie
For the non-edible variety, Amanda over at Dandelions and Lace created these super-cute plush Peeps.  Love them!  (She also has a tute for bunny peeps :)
Recycled Crafts:  Peeps bag topper
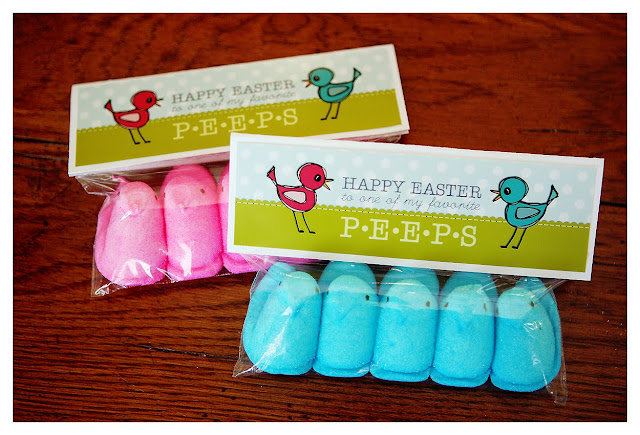
Show all your peeps they are loved with the free peeps topper from Eighteen25.  Print, package and present, how easy is that?


Figured out what to do with your Peeps yet?  We'd love to see them when you do!

Until next time,
Sister #3

Go Get Crafty, Sister!

Sunday, March 18, 2012

Treasure Chest

Pin It I know two little boys who have a great fascination with Mario and Luigi.  From blankets to t-shirts to video games, they love them all.  So, when I saw these cute Paper Mâché treasure chests on sale at Hobby Lobby for 50% off, I couldn't resist snapping them up in hopes of turning them into something those two little boys would treasure.


All it took was some some paper scraps, images from the 'net, a tub of Modge Podge, and a pair of sharp scissors.


Recycled Crafts:  Modge podge treasure chest tutorial, step 1 


Recycled Crafts:  Modge podge treasure chest tutorial

Recycled Crafts:  Modge podge treasure chest tutorial


Recycled Crafts:  Modge podge treasure chest tutorial
Pin It

Recycled Crafts:  Modge podge treasure chest tutorial
Top


Recycled Crafts:  Modge podge treasure chest tutorial
Back
Thanks for looking!
Until next time--
Go Get Crafty, Sister!
Sister #2


Sunday, March 11, 2012

Recycled Pallet into Book Shelves

Pin It
With the number of little ones frequenting our house recently, I decided that we needed a set of shelves at their level.  I had a space in the hall that was perfect, but finding the perfect shelving was another issue.


Enter:  The Recycled Pallet Shelves


For diy and Pinterest fans, these shelves are nothing new, but it was a great first "real wood" project for me.  Here is how it happened:


Recycled Crafts:  diy pallet shelves step 1
First I acquired the wood pallets -- free thanks to Freecycle!
Recycled Crafts:  diy pallet shelves, reciprocating saw
Next I grabbed my reciprocating saw and made a few strategic cuts.
Recycled Crafts:  diy pallet shelves after cut
By strategic, I mean so that what I ended up with looked like this: 
two slats on the back, one on the front, and the curved supporters.
Recycled Crafts:  diy pallet shelves sander
Next I grabbed the sander...
Recycled Crafts:  diy pallet shelves after sanding
and sanded the living heck out of every surface and edge.  Can't have any chance of booboo's!
 Recycled Crafts:  diy pallet shelves, scrap for bottoms
Found some scrap wood for the bottoms and cut them to size.
Recycled Crafts:  diy pallet shelves bottoms
Nailed down the bottoms.
Recycled Crafts:  diy pallet shelves on wall
Pin It Screwed them into the studs (they're not extremely heavy, but I was playing it safe.)
Recycled Crafts:  diy pallet shelves filled on wall
Pin It Finally, I filled them with all the necessities.


Recycled Crafts:  diy pallet shelves closeup
Pin It Minnie likes her new hangout.
Recycled Crafts:  diy pallet shelves being used by toddler
Pin It They're a hit!
Check out these other examples to see my inspiration:


Recycled Crafts:  diy pallet shelves by Ana White
Ana White (she's my hero!)  I hope to be as fearless as she one day.
Recycled Crafts:  diy pallet shelves by
 Strawberry Chick.  Very nice photos and tutorial.
Recycled Crafts:  diy pallet shelves by
ArtsyNina.  Can you believe she got her stain from her local hazardous waste facility--how cool is that?!?. 
Recycled Crafts:  diy pallet shelves
Little Lucy Lu.  I love these painted ones.  Just perfect for a little girl's room.


Until next time,
~Sister #2
Go Get Crafty, Sister!


Related Posts Plugin for WordPress, Blogger...
Those Crafty Sister are 
ready to create a unique upcycled, 
recycled, craft gift or teach you 
basic diy craft skills. Join us 
at http://thosecraftysisters.blogspot.com/, 
our craft blog where you can see what 
we've been crafting and sharing lately.
Pin It