Showing posts with label children. Show all posts

Friday, November 16, 2012

Turkey Tutu

Pin It
Recycled crafts:  toddler tutu
Sweet little girl with Turkey Onesie and tutu.  From start to finish, two hours, tops!
A few weeks before Thanksgiving, right about the time I discovered Pinterest, I stumbled across the photo below and knew I had to make one (the outfit, not the baby, lol)! I love how it turned out.

Recycled crafts:  toddler tutu

How To:

Supplies:
  1. Turkey Pattern (see below)
  2. Onesie
  3. 1 yard each of orange, yellow and ivory tulle
  4. Ribbon and fabric scraps
  5. Wonder Under
  6. Optional:  Fabric paint, needle and thread or sewing machine
  7. The following tutorial:  How to Make a Tutu No Sew 

Steps:
  1. Enlarge or reduce the pattern to fit the onesie
  2. Cut one body, one beak and six wings out of your chosen fabric.
  3. Follow the directions on the Wonder Under to apply the turkey to the onesie.
  4. Optional:  Use fabric paint to outline the turkey, or sew a zigzag stitch around the edges of each pattern piece.
  5. Watch and follow along with the video on making the tutu, using the tulle and ribbon
  6. Dress a cute baby in the outfit and bring on the smiles!


Recycled crafts:  toddler tutu:  turkey pattern


There are all kinds of tutus on Pinterest; many are on my mental "to do" list.
Here are some of my favorites:

Recycled crafts:  toddler tutu:  snowbaby
Snowbaby


Until next time,
~Sister #2

Tuesday, October 2, 2012

Iron-On Wall Portraits

Renters and minimalists rejoice, for today you will learn how to take those photos that have been stuck in digital limbo and transform an entire wall (okay, maybe a small wall) into a photo gallery even your landlord can’t object to.  Using a $5 roll of fabric adhesive and your trusty iron, you can take your rented walls from ho-hum to a work of joy.  And when you're ready to move, these prints peel right off with no sticky residue or telltale nail-holes of horror.

 
  What you need:
  1. ·      Black and white or color untrimmed photos printed on standard paper
  2. ·      Iron-on lightweight fabric adhesive (like Wonder-Under or Heat 'N Bond)
  3. ·      Painters tape
  4. ·      Iron
  5. ·      Thick fabric or towel
  6. ·      Old pillowcase 


What you do:

1.  Cut a piece of fabric adhesive slightly larger than your photo.


2.  Lay thick fabric or towel on a hard surface, with photo face down on top.  Lay fabric adhesive, shiny side down, on top, so your photo is sandwiched between the thick fabric and adhesive.

 3.  Following the instructions that came with the adhesive, use your iron to fuse the adhesive to the back of your photo.  (If the idea of ironing paper scares you, cover your "sandwich" with the pillowcase before ironing.) 


5.    Trim your photo and peel off the adhesive backing.


6.  Lightly tape your photo in place on your wall and tape your pillowcase over the photo.  
7.  Using the same setting on your iron, fuse your photo to the wall.  If you have heavily textured walls, you may have to go over the fabric several times.  (Alternatively, you could fuse only the edges of your photo to decrease ironing time and minimize the amount of texture picked up by your photo.)

8.  That’s it!   Repeat with remaining photos and enjoy your wall!

But wait!  What if you want to remove it?


When you're ready to remove the photo, just peel it off.  If your iron was too hot when you ironed the image on, part of your photo might refuse to budge.  In that case, simply reheat with your iron to loosen the adhesive and continue peeling.

Friday, September 21, 2012

Fall Flowers Cornucopia

Now that fall is just around the corner, I wanted to post a photo of a gift I received last year from my niece.  Following in her mother's footsteps, Erynne is a teacher and crafter extraordinaire!  She actually taught her students how to make this awesome cornucopia, and you'll never guess what it's made of--yarn and a paper plate!

Now to get her in here to do a tutorial for us!

Until next time,
Go Get Crafty, Sister!

~Sister #2

Sunday, August 5, 2012

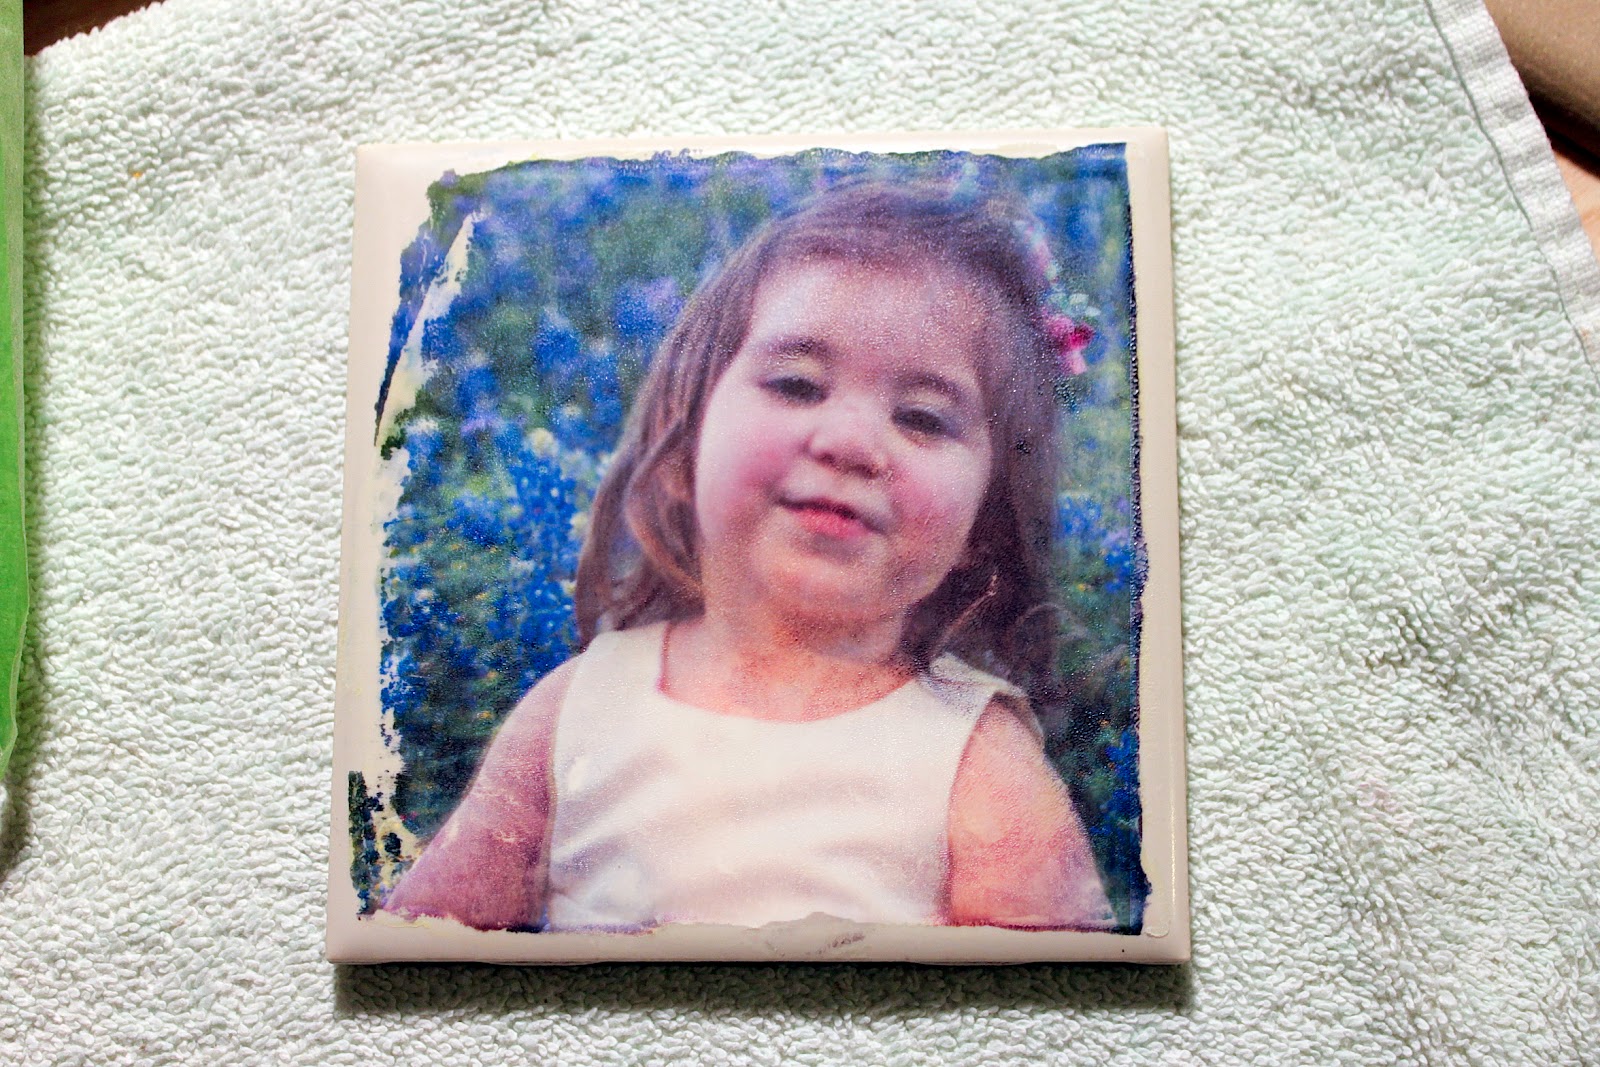
"Iron-on" Tile Coasters

This tutorial was feature a few weeks ago over at Free Time Frolics:

Iron-On Tile Coasters
Here's the deal:  You're at a rockin' party, dressed to the nines, jammin' with the music, a drink in one hand and fist bumpin' your favorite peeps with the other.  You're halfway through the room when you spy the buffet table, piled so high with delish free food that you're going to need both hands to hold your plate.  Here in lies the problem--what to do with your drink.  Set it down on the food table where someone's peeled shrimp might take an unexpected dive?  Carefully sandwich it under your arm and hope none of the margarita salt rubs off on your Armani silk shirt?  Or leave it on the carefully polished coffee table and chance the wrath of your host by leaving a tell-tale ring?

No worries, my friend, because mankind long ago came up with the answer.  No, it's not the beer drinker's helmet or the 6-pack holster--I'm talking about that age-old denotation of ultimate sophistication:  the coaster.

And today I'm going to show you how to make that coaster the envy of all those purveyors of sophistication, by personalizing it with your own photos.  And we're not just going to cut them out and slap them on with a little white school glue--we're going to use heat transfer.

We've all seen tile coasters, either decorated or painted or decoupaged with photos.  Maybe you even created some last year for Christmas as a kid.  I really thought I'd exhausted the different ways to decorate the common bathroom tile, but when I read about transferring photos to tile using iron on's, I couldn't wait to try it!

What you'll need:

  1. 4" x 4" Tile:  This works easier with unglazed tile, but colors are brighter with glazed.  (I sanded the glazed tiles before transferring the photo.)
  2. Photo transfer paper
  3. Tape
  4. Iron
  5. Water-resistant sealer
  6. Cork or felt tabs


1.  Print your photo on the photo transfer paper, following the manufacturer's directions.  Cut around your image leaving a 1/2" border.  Tape it upside down to the edge of the tile.  This will help to keep the photo from slipping.


2.  Preheat the iron using the highest setting (don't use steam!) and fold the photo back away from the tile.

3.  Heat the tile:  working on a protected surface, and using gloves to protect your hands from the hot tile, place your iron onto your tile for 1 minute.


4.  Carefully flip the photo over onto the tile.  Since the transfer paper smears easily when hot, you need to tack the transfer first by lightly gliding the tip of the iron across the back two or three times.


5.  Iron it down:  Using firm pressure, (and being careful not to move the transfer) iron the paper to the tile.  Go back and forth, pressing firmly around all the image.  Make sure to do the edges really well, because that's the area that seems to have the hardest time with the transfer.  When you are finished, set the timer for one minute and do some deep breathing or something.  You don't want to take the paper off too soon, but you also don't want to leave it on too long or the paper will get stuck to the tile.  (If that happens, heat the paper again and you should be able to get it off.)


You can see that the edges do not come off sharp and crisp, and the image has sort of an aged look to it, but I think that only enhances the end result.


6.  Wait till the tile completely cools (at least 10 to 15 minutes), then seal the tile using 2 to 3 coats of sealer.
7.  Attach cork or felt to the bottom.

I just love the look of this!  I can see a whole row of tiles lined up across a backsplash or several grouped together in a frame.  I'm planning on making a tile planter for a friend, and I'm definitely going to incorporate this technique.

If you like this project idea, you would love the book that I got the idea from.  There are 50 projects, and they're not your regular run-of-the-mill projects either!  Just a few I plan to try:  mirror frame, plexiglass accordion frame, rice paper screen and even a shower curtain! I don't usually purchase real hold-in-your-hands books for diy stuff any more, (that's why we have the internet, right?) but in this case I'm glad I broke down and got it.


Until next time,
Go Get Crafty Sister!
~Sister #2


Monday, May 14, 2012

Top 10 (As Voted on by Teachers) Teacher Gifts

In a recent poll, 500 elementary school teachers were asked to name their favorite end-of-the-year gifts from students.  Here are their answers:

#10  Summer related gift (i.e. beach towel, hat, etc.)  
Coincidentally, in my last post I pictured an example of this.  Put together a bright beach towel, a magazine and a fun pair of sunglasses (like these from Hippi Fashionista) and tie it up with a ribbon!
#9  Personalized stationary
This is easy to find in any office supply store of gift store. You can also think ahead and get it printed before hand by any number of online printers.
#8  Magazine Subscription
You'll need to find out your teacher's interests for this one--but stay away from education magazines, even a travel magazine is preferable to a monthly reminder of work.
#7  Plant/flowers
A daily reminder that he/she is appreciated.
#6  Gift basket
Try to find a theme your teacher likes—for example, gardening or cooking.  You could make this yourself using a nice basket. 
#5  Gift Card to teacher supply store/office supply store/etc.
#4  Food
Food is always appreciated, but some teachers mentioned receiving frozen casseroles or hand delivered submarine sandwiches during the last week of school.
#3  Sincere thank you note
A handwritten letter from the parents expressing sincere appreciation.  Give a copy to the principal and the teacher (if you let him/her know) will be doubly thankful!
#2  Gift card for coffee
A standard, but always appreciated.
#1  Gift Card for restaurant
Many teachers mentioned this was appreciated because it allowed them to go out and celebrate the end of the school year.

Whatever you decide, it is bound to be appreciated--and the older your child is, the more the teacher will appreciate it.  Gifts for teachers in the 7th - 12th drop by 90 percent(!), so sending even a small token of appreciation to these teachers will be even more appreciated!

Until next time
Go Get Crafty!
~Sister #1


Linking Up Here:


Friday, May 11, 2012

6 Great End-of-Year Teacher Gifts

It's that time of year again--time to put together a *few* gifts for the awesome teachers and aids who have been a part of my son's education this year.  So naturally, the first thing I did was head over to Pinterest to take a look at the board we sisters have put together dedicated to gifts!

Here are a few of my favorites:
  ↑ Summer teacher gift: a beach towel, magazine, sunscreen & sunglasses tied together; 
featured by Junk in Their Trunk.

Sunday, April 22, 2012

My Mommy Board Book: Photoshop Tutorial

We have a beautiful little girl staying with us until her mother returns from deployment (you might have seen here in my post about printed fabric pillow dolls).  I decided to make a board book for the baby (she is still a baby, relatively speaking) with photos of her mother.  

Here is the first stage:  Creating the Pages in Photoshop
(Note:  this can also be seen at miller626.blogspot.com where I blog about Photoshop.)
Recycled crafts:  boardbook diy Photoshop image showing original boardbook

First I found a board book at the thrift store that had seen better days.  This one,
in fact, was destined for the trash bin at the end of the week.

Thursday, April 19, 2012

7 Great Photo Board Books

I'd really like to make a photo board book for a special girl (you might have seen here in my post about printed fabric pillow dolls) whose mother is deployed to the Middle East.  I love using Mixbooks, and I've made several photo books through them (their scrapbooking software is very user friendly, and they have wonderful designers who are constantly coming up with new designs) so I naturally looked there first.

Collage of Photo board books from Memory Mixer
Personalized Board Books

Beautiful, right?  However, although they look awesome, the price tag is a little too 
steep for my budget right now.  So I set out looking for alternatives.  Below are some of the creative Board Books I came across in my search.

But first, I did come across this blank board book from Amazon.  I was tempted to buy it, because I couldn't bear the thought of destroying a book, but a quick trip to the thrift store uncovered a 
few that were headed to the trash bin.

So on with the inspiration... 
Recycled crafts:  ABC upcycled altered board book made with Modge Podge for kid's crafts and reading
ABC homemade board book
 Audrey from Audrey Pettit's Weblog created a 
nursery rhyme/ABC board book from a recycled kid’s meal toy.

Recycled crafts:  Upcycled altered board book about baby madle with Modge Podge and scrapbook papers
Homemade board book for baby
Katie created this board book to celebrate her child.  
You can see it over at Katies Nesting Spot
Recycled crafts:  upcycled altered word board book made with Modge Podge for child's first words
Homemade "first words" board book
I love this board book from Chef Messy that is making its rounds on Pinterest. 


Recycled crafts:  Upcycled altered board book of colors for child's first reading
Homemade board book of colors
Here's a cute altered board book I saw at Modge Podge Rocks.  (Love that site!)
Recycled crafts:  Upcycled altered board book of family
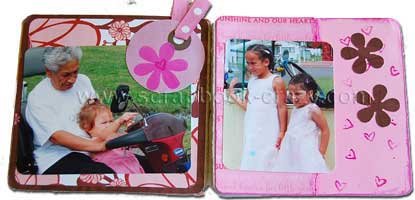
Family memories homemade board book

This one over at scrabook-crazy.com is really listed as an altered board book.  
Different name, same concept.  Same adorable-ness!


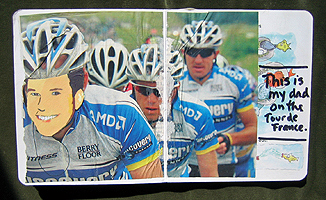
Recycled crafts:  Upcycled altered board book with father's face pasted on background
Homemade board book about Dad
Don't you just love this board book idea from rookiemoms.com?  Dad's face is pasted on top of different "environments" cut out of magazines.


Recycled crafts:  upcycled altered baby board book with baby's first days
Baby's birth recorded in a homemade board book
Another homemade board book celebrating a child!  Oscar will love having this book read to him!  
You can see it, as well as one titled "Oscar's Black and White Book," over at Homemade By Jill.

Sunday, March 18, 2012

Treasure Chest

Pin It I know two little boys who have a great fascination with Mario and Luigi.  From blankets to t-shirts to video games, they love them all.  So, when I saw these cute Paper Mâché treasure chests on sale at Hobby Lobby for 50% off, I couldn't resist snapping them up in hopes of turning them into something those two little boys would treasure.


All it took was some some paper scraps, images from the 'net, a tub of Modge Podge, and a pair of sharp scissors.


Recycled Crafts:  Modge podge treasure chest tutorial, step 1 


Recycled Crafts:  Modge podge treasure chest tutorial

Recycled Crafts:  Modge podge treasure chest tutorial


Recycled Crafts:  Modge podge treasure chest tutorial
Pin It

Recycled Crafts:  Modge podge treasure chest tutorial
Top


Recycled Crafts:  Modge podge treasure chest tutorial
Back
Thanks for looking!
Until next time--
Go Get Crafty, Sister!
Sister #2


Related Posts Plugin for WordPress, Blogger...
Those Crafty Sister are 
ready to create a unique upcycled, 
recycled, craft gift or teach you 
basic diy craft skills. Join us 
at http://thosecraftysisters.blogspot.com/, 
our craft blog where you can see what 
we've been crafting and sharing lately.
Pin It