On to the assembly:
 |
| Cupcake stand "bodies." |
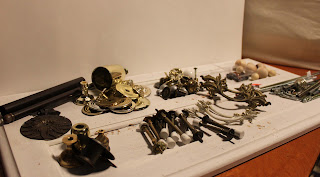
The "stand" part of the cupcake stands were made from various items found mostly at thrift stores and garage sales: candlesticks, furniture legs, newel posts (cut down to size) and even a salt and pepper shaker set. I have to thank my mother for most of these finds, since it's hard for me to visit these places on a regular basis. (Thanks, Mom!)
 |
| Cupcake stand parts. |
I used a variety of items for the handles: drawer knobs, door stops and wooden beads. Extras for assembly included screws in varying lengths, and a variety of odds and ends from a big tin collect-all in the garage. (I even used parts from a few old trophies, lol.)
The plates, now decorated and sprayed with a clear acrylic finisher spray, were drilled assembly-line style (I learned the hard way to start with a small hole and gradually enlarge):
a dremel for the first hole (because the dremel accommodated the smallest bit),
an electric drill for the second (the electric drill was more powerful than the cordless), and
a cordless drill for the third.
Finally, the plates were ready to put together!
 | ||
| Melamine plates painted "ballet slipper" pink, ceramic candlestick "body," brass candlestick base, wood bead topper. |
 |
| Print and cut design using inkjet transparencies. |
 |
| Silver vinyl designs |
 |
| Print and cut design using inkjet transparencies. |
 |
| Black cardstock |
 |
| Print and cut design using inkjet transparencies. |
 |
| Print and cut design using inkjet transparencies. |
Until next time,
~Sister #2
Coming Soon: Our First Event! (Part 3--at the event)

No comments:
Post a Comment
Your comments mean so much to us!